Sparking Young Children’s Engagement
How to Use Creative and Unconventional Containers in your Classroom
| November 2016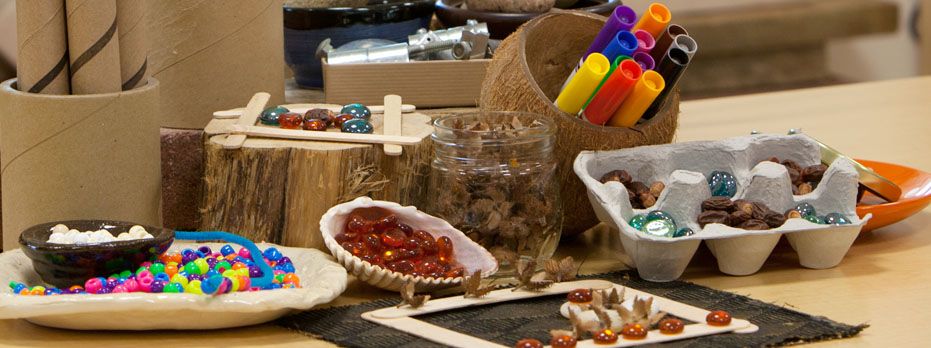
Containers are essential components to any early childhood classroom. Available in many sizes, shapes, and colors, containers are used to store, hold, and tote a variety of learning materials and supplies. In fact, they are such a commonplace classroom element that rarely a second thought is given to them, especially after being placed on the shelf. Containers, however, are much more than bins and baskets. This article will help you think about containers from a different perspective: What if the primary job of containers in the classroom is not to just hold learning materials and objects but rather to intentionally spark children’s interest and engagement with the contents?
Use the 4 C’s of Container Selection below for guidelines, inspiration, and getting started in selecting your classroom containers.
4 C’s of Container Selection
#1: Select Containers that CAPTURE Children’s Attention
In order to generate children’s interest, the container’s contents must be visible. To promote visibility, try using containers with low or even no sides. Because these types of containers do not restrict the view of the contents, they are extremely effective in capturing children’s attention.
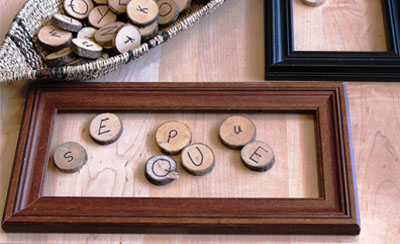
A good example of a no-sided container is a picture frame. Remove glass and backing and any wire or hardware from the frame. Place the empty frame on a table along with a basket of interesting objects for children to create their own masterpieces within the no-sided container.
Central Michigan Child Development Lab Center (Mount Pleasant, Michigan)
You can also use empty frames as containers for 3-D objects that children have found or collected. Mount the empty frame to the wall using Commando™ or 3M picture-hanging Velcro™ strips. Then, inside the frame, hang child-found 3-D objects directly on the wall. Here are some easily found 3-D objects to place inside empty frames for the various areas in your classroom:
Classroom Area |
3-D Object |
|
Blocks |
Small multi-colored wood blocks |
|
Home Living |
Spoons or other kitchen utensils |
|
Library/Quiet |
Hard-cover books or book jackets from children’s storybooks |
|
Math/Writing |
Giant-sized wood letters or numerals |
|
Art |
Different sized and types of authentic paintbrushes |
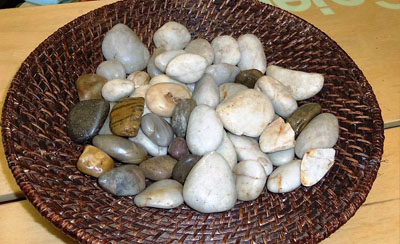
A similar idea is to encourage children to contribute their personally found objects to empty frames. Going on nature scavenger hunts at the local park, playground, or even at home for finding objects to fill empty frames is an exciting way to connect children with the classroom’s no-sided containers. Children can collect all sorts of interesting natural materials such as rocks and pebbles, pods and seeds, bark or twigs to add to empty frame containers. And, you don’t even need authentic frames—you can easily make frames with sticks and twigs.
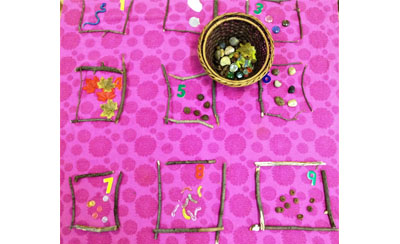
Irvine Nature Preschool (Owens Mills, Maryland)
#2: Select Containers that are CONVENIENT
In order for children’s engagement to be sustained, containers must be convenient. These types of containers have two important elements:
1) The container is functional.
2) The container’s contents are easily accessible.
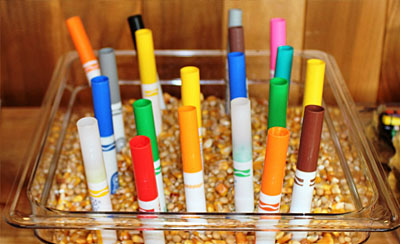
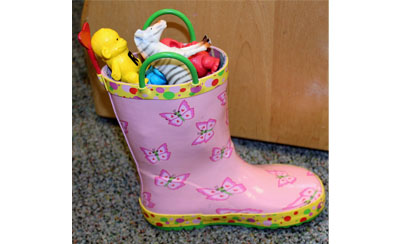
Containers are functional when they are easy for children to access, manage, and transport their contents to other places and spaces in the classroom. If your objective is for children to be able to move the containers around the room, try using medium-sized and easy-to-handle containers made out of light-weight materials. Select containers with handles, holes, or places where children can get a good grasp. If, however, you do not want children to transport containers to different parts of the room, but want the children to take one item from the container to use, choose heavy containers with holes, slots, or spaces to hold individual objects.
Central Michigan Child Development Lab Center (Mount Pleasant, Michigan)
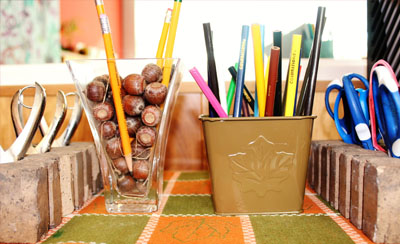
Clay bricks make great non-moveable containers for small objects. The holes in the bricks make great places to store writing tools and art supplies such as scissors, pencils, markers, and paper punches. These types of containers work well when there are a large number of similar objects to be used by many children. For example, a large tin can weighted down with rocks, buckeyes, sand, dried popcorn kernels, or coffee beans can hold rulers or paintbrushes. The sheer weight, size, and shape of the container communicates to children that the container must remain in place.
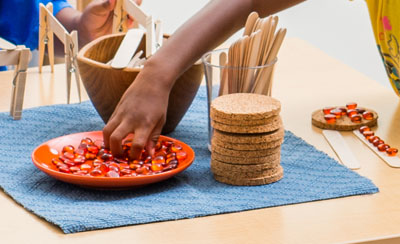
#3: Select Containers that CONNECT Activities to Container
Another way to sustain children’s interest and engagement is to use containers not only for storage, but to use them as part of the classroom’s activities. Fill a strawberry basket or colander with pieces of weaving materials (i.e., fabric, ribbons, pipe cleaners, twine) and use the basket as a weaving base. Nested boxes with buttons stored in the smallest box triggers the hands-on activity of sorting and classifying in the different sized boxes. Cookie tins, muffin tins, or baking trays filled with assorted magnetic pieces are another example of how the container becomes a part of the children’s activity.
Containers that both hold materials and promote children’s interaction with their contents are very practical because they make direct suggestions to children about the ways in which the materials and the container can be used together. Since there is no need for adult instruction or demonstration, the child’s autonomy and initiative are stimulated. In a toddler room, for instance, a pre-service teacher offered an inclusive container of both the materials (pipe cleaners) and the container (colander). This inclusive container was designed for children to weave the pipe cleaners through the colander holes. She predicted that the activity would last for 5 or 10 minutes because of the limited attention span of this age group. The activity continued for a good 20 minutes of sustained and focused engagement with the container.
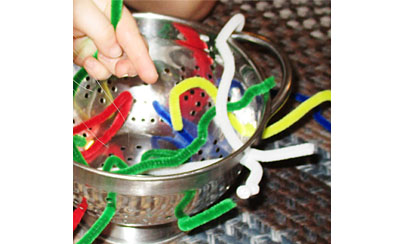
Leet Center for Children and Families, Northwest Missouri State University (Maryville, Missouri)
#4: Use CHILD-CREATED Containers
There are many types of containers children can make. Creating and gifting these containers to the classroom not only promotes children’s engagement with a variety of materials but honors their work when displayed and used by others.

The Adventure Club (Schererville, Indiana)
Kindergartners enjoyed making the button bowl by gluing (with liquid glue) flat buttons onto a blown-up balloon. After the glue dried, the balloon was popped leaving behind a beautiful bowl. Another way to make a classroom container using buttons is to make a button tray. Simply mix liquid glue with sand and first press the glue into the bottom of the tray and then press buttons into the glue-coated bottom of the tray. You can also use Plaster of Paris™ for this project.
Family Child Care (Baltimore, Maryland)
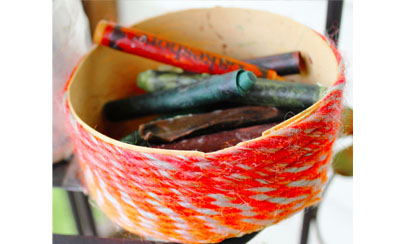
Another idea for child-created containers is to use clean microwave dinner trays and bowls. Children can glue on fabric, yarn, and twine to make wonderful classroom containers. Something important happens when child-created containers are actively used and enjoyed. Children experience self-satisfaction and a sense of pride when their containers become an important part of the classroom.
From Conventional to Unconventional Containers
All of the containers pictured in this article have one thing in common. They are unconventional. It is human nature to pay more attention to something that is different. Conventional containers create a sterile environment, while unconventional containers awaken a sense of energy and excitement. So, think critically about the containers in your classroom. Do the containers in your classroom primarily hold objects or do they also grab the children’s attention and entice them to explore the contents? Are they ordinary . . . or are they extraordinary?
To begin thinking out-of-the-box (no pun intended), survey your classroom using the following questions:
|
Do you have more primary colored plastic containers than containers made from natural materials? |
Yes |
No |
|
Do you have more conventional containers (boxes, bins, baskets) than unconventional containers (no-sided, repurposed, and child-made containers)? |
Yes |
No |
|
Are there more containers similar in type (clear plastic totes with lids or no lids, coordinated sets of bins and baskets) than containers that have variety (assortment of varying sizes, shapes, colors, and materials)? |
Yes |
No |
If you answered ‘yes’ to at least two of the questions, it is time to re-consider the purpose of the containers in your classroom. It’s time to find captivating and attention grabbing containers for your classroom. It’s easy to find non-traditional containers once you embrace the new perspective that the purpose of containers are for attracting children’s engagement with their contents rather than just holding objects. Use this new lens when rummaging through garage sales, thrift stores, or even your own basement or attic. Think about how you could reposition or repurpose found objects into useful and captivating containers. Here are some more ideas to help you think about containers from this new perspective and get you started:
Children’s Home + Aid (Palatine, Illinois)
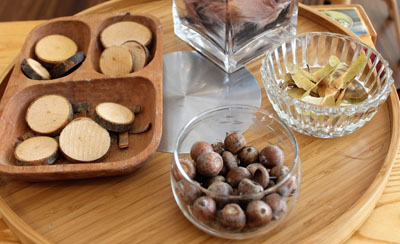
Various shapes and sizes of dishes
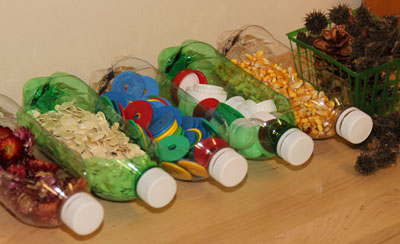
Repurposed bottles and strawberry basket

Large shells can hold other loose parts
An Invitation
You are cordially invited to a container party. Bring a unique and nontraditional container to your classroom—and put it in an unconventional place. Then, stand back and watch the fun begin.