The Power of Music in the Learning Process
| October 2006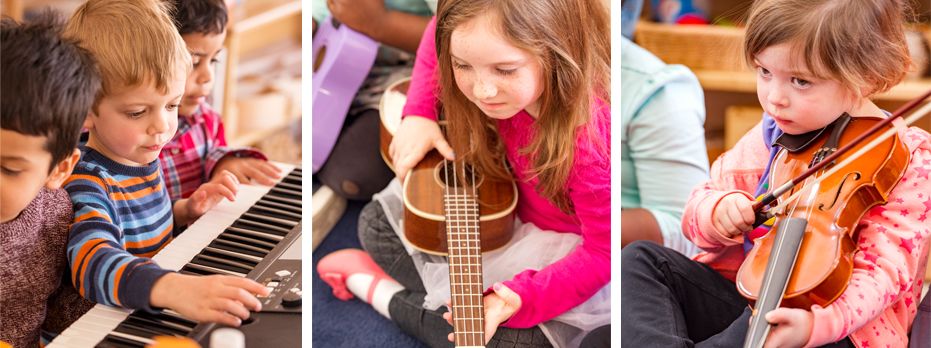
"“Giddy-up horsy, let’s go!” John says, and we all go galloping around the yard singing, “See the pony galloping, galloping down the country lane….” Little voices join in as Josiah overtakes me on his imaginary horse. We slow our horses as we finish the song, “…all tired out, all tired out,” and put our horses back in the corral. We give our horses a loving pat and a carrot treat as we move on to the next activity. These 3- to 4-year-old boys and girls are having a great time as we visit Old MacDonald’s farm, using our imaginations and lots of active movement and music in Miss Ro’s big back yard. We are learning about the animals on a farm, and the sounds and movements they make; we are learning to care for animals and treat them with kindness and respect; we are learning about large motor movement, coordination and balance, vocabulary, beat, rhythm, and we are getting lots of fresh air in the great outdoors!The list goes on. Throughout the week I hear from parents about how their child responded to our “trip.” Music class is making a big impact on these little lives.
Music and movement is a powerful tool, encouraging the young child to learn in fun and exciting ways. As teachers and caregivers, we can help children to “see” into an imaginary world and create fun without the use of fancy and expensive props, toys or visuals. Through music and movement activities, we can help children to explore the world of nature, especially when we take them outside. Encouraging children to move, dance and sing while they are playing promotes a healthy lifestyle and often teaches them how to play. Many children’s homes are filled with TV, video or computer games and super busy working parents who don’t have much time to get down on the floor and play with their children. All the more reason that our classrooms should be filled with singing games and folk dances like Shoo-fly Don’t Bother Me, London Bridges, Here We Go Round the Mulberry Bush, Mary Mack, and Hot Cross Buns. As well as being fun and educational, they also encourage a sense of community, provide insight into other cultures and reinforce social skills like taking turns and teamwork.
Children who are moving, playing, singing and dancing have the potential for a healthier lifestyle. Music provides hope and joy, a sense of rhythm, balance and coordination, movement opportunities, security, energy, and it certainly burns up calories. Maria Cheng’s recent article on the value of play states that “youngsters between ages 5 and 16 need to be active up to 1.5 hours per day." (Cheng, 2006) According to lead author Dr. Lars Bo Andersen, "just making sure children play outside will double the amount of physical activity they get." If this is true for 5 to 16 year olds, what does it mean for little ones? We know that a sedentary lifestyle is unhealthy. In this study, all the children who participated had healthier numbers for blood pressure, cholesterol and insulin levels, not just the overweight ones!
The effects of music and movement on developmentally appropriate practices in early childhood are profound. According to Joyce Jordon-DeCarbo, PhD (University of Miami, FL), “Music or various types of instrumental accompaniment can enrich movement activities. Music incorporates all the rhythms of locomotor skills and can express fundamental movements.” (from an article reviewed in Perspectives, a publication of the Early Childhood Music and Movement Association). She explains that programs should be child-centered because children learn to move not by the process of imitation but by experimenting with their own ideas, asking questions, and finding solutions to problems presented by the teacher (Grineski 1992).
Another study of children who took music classes showed that their memory skills were greatly enhanced compared to children who had no music classes outside of school. The study indicated that music lessons seem to wire the brain differently, and the results after just one year were significant. There were even measurable improvements in the first four months of the study! Not only did these children develop musical retention; they also greatly improved their non-musical memory skills such as math, literacy, visio-spatial processing, verbal memory and IQ! (Trainor, 2006)
If you visit a retirement home and ask the residents about what they did yesterday, many of them will not be able to tell you, but start singing the songs of childhood or chanting an old nursery rhyme and they will sing and chant right along with you, though they may not have heard the songs in over 50 years! Music has the power to help us remember. It makes connections within the brain that encourage memory.
Walk into any classroom today and you may hear and see commotion as the teacher tries to get the children to sit down, quit wiggling, and listen to what she is trying to teach. As I work with teachers, they tell me it is getting more and more difficult to receive cooperation from their young students, while the pressure mounts for children to do what is expected of them so they will learn and their test scores will show it. A child’s natural instinct is to move and be actively involved in the learning process. It seems that it is in the children’s, the teachers’ and the school’s best interests to teach them in a way that will help them learn! It is my experience that music and movement makes learning fun, purposeful and memorable by addressing the various needs of the young child. As I look at the behavior problems within a classroom, I can’t help but notice that something is missing. It behooves us to take a look at what has been eliminated from the classroom and get it re-instated. Teachers need to be supported as they incorporate more music and movement activities into the learning process and the school day! Music and Movement has the power to increase learning and make it fun and long lasting as well.
ACTIVITIES PAGE:
Creating music together on a regular basis is one of the best things that you can do for your classroom or family. Music draws a group together and builds community. Working and playing together to make music is a great memory-maker, and it’s a lot of fun. It doesn’t matter how much musical experience you have, because everyone has a voice and the ability to use it. Everyone can play simple instruments, and clap or tap a rhythm. Sing, dance, move, tap, shake and ding to your heart’s content!
TIPS
- Have a CD player available with a collection of your favorite music, and have a sing-a-long. Sing and dance and have a great time together playing simple rhythm instruments or body percussion. (Scarves or streamers make great dancing implements too.)
- Use simple rhythm instruments for steady beat activities or a marching band. (drums, shakers, rhythm sticks, bells, triangles)
- Select a theme to vary your musical times, especially if you have school age children. What are they studying in school? Countries, cultures, colors, animals, numbers…use that as your theme and have the children think of songs or activities to fit.
- Invite another family to join you and “Share the Music!”
- Have a “found sound” session. Look around the house or classroom to find unexpected sound-makers and use them in a “Found Sound Band.”
- Assemble the materials and make some simple rhythm instruments as a family or classroom activity. See below for some instruments you can make.
Relax, have fun and enjoy a time of music-making together. You won’t regret it.
INSTRUMENTS YOU CAN MAKE
SLAPSTICKS:
You will need:
- 3 painter’s stirring sticks about 18” long (you can get these at a paint store).
- non-toxic craft paint or stickers
- yarn
- craft or wood glue
- saw
- You can paint the sticks before you start gluing, or add stickers after it is all dry.
- Have Mom, Dad or teacher cut one of the sticks about 4” long with the saw and glue it between the other two sticks at the end where it curves. Line up the curves and glue together.
- Let dry.
- Wrap the handle end (three pieces of wood) with yarn, being sure to glue or tie the ends off securely.
- You are ready to tap your slapstick on your hand or hip or floor and it will make a wonderful slapping sound.
STREAMERS:
You will need:
- 3 or 4 different colored packaging ribbons, cut to 36 inches long
- 2 tongue depressors or ½” wide craft sticks for each streamer
- glue gun (adult supervision please) or craft glue
- Place one stick on a table and put a little glue at one end of the stick.
- Lay the ribbons over the glue about 1 inch from the end of the stick.
- Place a stream of glue down the length of the stick and over the ribbon ends.
- Place second stick over the top and press.
- You can paint the handles or add stickers to decorate them.
- Allow them to dry, then dance away.
SHAKERS:
You will need:
- empty film canisters
- glue (glue gun works very well but needs adult supervision)
- something to fill the canisters with: beans, rice, popcorn, or other items such as pennies or paper clips for different sounds
- If you are using clear canisters, put a piece of paper around them to mask what is inside, so you can play matching sound games.
- Fill canisters with the same amount of any item: about 1/3 to 1/2 full.
- Use glue or glue gun to secure the top of the shaker.
- Shake!
If you fill about 4 different pairs of items in your containers, you can play matching sound games. This is a great way to encourage critical listening skills. Put a yellow sticker on 4 different shakers and a red sticker on the other 4 shakers.
Shake one yellow canister. Listen.
Pick a red canister. Listen.
Do they sound the same or different?
Continue on until you match all the pairs, always going back to the control (yellow) shaker.
Sing and dance, shaking your shakers in time to the music.
RHYTHM STICKS:
You will need:
- 3/4” wood doweling, 12 - 36” long depending on how many rhythm sticks you want to make
- saw
- sandpaper
Parents and teachers: please supervise and/or cut the doweling into 6” lengths. Sand the ends and sides smooth and you are ready to go!
Natural wood items are great instruments for young children. They can put them in their mouths and explore their sounds without hurting themselves. Tap the sticks together, wave them, roll them, tap different parts of your body, (gently!) tap the floor in time to the music. They make a wonderful sound, don’t they?
TAMBOURINE:
You will need:
- Sturdy plastic or paper plates. Bright colors are fun!
- dried beans or macaroni
- craft glue
- markers or paints and/or stickers
- hole punch
- yarn or ribbon
- Decorate the tambourine by painting or drawing on the bottom of the plate, which will be the outside of your tambourine. Use markers, paint, stickers, etc. (If you are using paper plates, you can use crayons too.) Let it dry.
- Place about 2 tablespoons of beans or macaroni in the bottom of a plate. Put glue around the rim of the plate. Be careful to not use too much glue or it will take a long time to dry.
- Gently place a second plate on top and squeeze lightly around the rim. Allow it to dry.
- Use a hole punch and make 6 to 8 holes around the rim. This can be very difficult for small hands, so parents and teachers will need to help, especially with plastic plates. Thread ribbon or yarn through the holes and tie into knots. Curl ribbon!
- Tap and shake your tambourine in time to the music. Have a fun time Jammin’ with the family!
DRUMS:
You will need:
- any sturdy round container such as an oatmeal box, hat box, or metal can
- sturdy paper such as freezer paper or brown wrapping paper
- scissors
- craft glue
- paint brush
- Place round container on paper and draw a circle around the container. Draw another circle about 2 inches outside the first circle.
- Cut out on the outside circle.
- Cut slits from the outer circle to the inner circle about every inch or so, depending on the diameter of your container.
- Spread glue with a brush onto all of these tabs, making sure that the glue is spread evenly.
- Place the paper glue-side down on the container top and press down the tabs on opposite sides of the container to keep it even and smooth, making sure that the cuts do not go over into the center of the container. This is your drum head.
- Lightly dampen the head of your drum and allow to dry.
- You can also cover the sides of the container by laying it flat on the edge your paper and wrapping it around the container until it overlaps about one inch. Mark this spot, draw the rectangle with a ruler and cut it out.
- Color it or decorate it with stickers, then glue the wrapping paper around the can by spreading your glue evenly over the whole surface, using the brush.
- Allow to dry, then have fun with steady beat activities.
Mallets: Use sturdy chopsticks or a straight stick that is about 8 - 10 inches long. Stuff a couple of cotton balls into a 3 inch diameter piece of fabric, wrap tightly around the stick with yarn or string and tie a tight knot.
RAIN STICK:
You will need:
- a sturdy cardboard paper tube about 12 - 24 inches long x 1-1/2 inches wide
- tin foil about 1 1/2 times longer than your tube
- duct tape
- uncooked rice
- Spray-paint the tube before starting the project if you like, and/or use markers or stickers to decorate it.
- Tear off a piece of tinfoil at least 1-1/2 times longer than your tube and scrunch it up length-wise until it is about 1/2” in diameter.
- About every 3 inches, make a fold or kink in the long piece of tinfoil so it is all zig-zaggy.
- Put this inside your tube and fasten it at one end. Cover the end by gluing the cap in place, or duct tape it closed.
- Tape the other end of the tinfoil at the top opening. It should be zig-zaggy up to the top. Place about 1/2 a cup of rice inside and cover the end temporarily. Do you like the sound? Adjust with more or less rice until you like its sound as it drops and hits the tin-foil all the way down to the bottom.
- Cover the other end with a cap or duct tape. When playing your rain stick, hold it so that it is at an angle and tip it slowly so the sound will last a long time. Tip it the other way to keep the sound going.
References
Maria Cheng's brief summary of this study isavailable here.Research Review: The Effects of a Developmentally Appropriate Music and Movement Program on Motor Performance by Evridiki Zachopoulou, Technological Educational Instituition of Thessaloniki, Greece, Aggeliki Tsapakidou, Aristotle University of Thessaloniki, Thessaloniki, Greece, and Vallisliki Deri, emocritus University of Trace, Thrace, Greece (2004). Early Childhood Research Quarterly, 19, 631-642.
Research Review: Laurel Trainor, professor of psychology, neuroscience and behavior at McMaster University in Hamilton, Ontario, Brain, Sept. 20, 2006